Easy installation BEAM-IT-UP®
It has never been easier to enlarge your living space without moving
1. Determine the wall type
First determine the wall type of the room or hallway (lightweight or concrete). You just knock on the wall to hear what type of wall you have. A lightweight wall (ex. Plasterboard) – it will make a good noise where as concrete is like knocking on a stone. When buying in our online shop all required screws and dowels for the different wall are included.
2. Mounting of wall rails
It is important to use the correct type of screw/Raw plug for the wall in question. For plasterboards and other type of lightweight’s wall use Duotec 12. In concrete or wood use the screws included just be aware when installing screws directly into wooden walls, a minimum of 30 mm of wood is required, otherwise use Duotec 12.
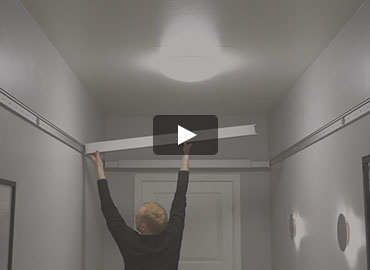
3. Set up the beams between the rails
Each BEAM is telescopically with 30 cm – it places very easy in between the wall rails. Please follow the instruction manual and the movie here. An installation height of (H) of 210 cm is recommended for ease of use.
4. Assembling and setup of modules
Assemble the storage modules according to the installation manual. It will not take you long but here you need to be a little handyman..
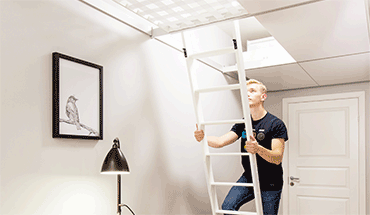
5. BEAM-IT-UP is ready to use
When the storages modules are put into place. They are ready for use. In the storage box with 3 compartments you can load up to 20 kg. In the shoe rack 12 pair of shoes. On storage net you can load 25 kg and on a storage shelf 40 kg.